Lesson · 2nd, 3rd, & 4th Grade
Angles
This lesson involves two activities: building a rotating "paper protractor" and an "angle comparison strip." The main purpose of both is to improve students' ability to estimate and compare angle measurements, which makes later work on triangles, protractors, and rotations far more effective.
The big idea
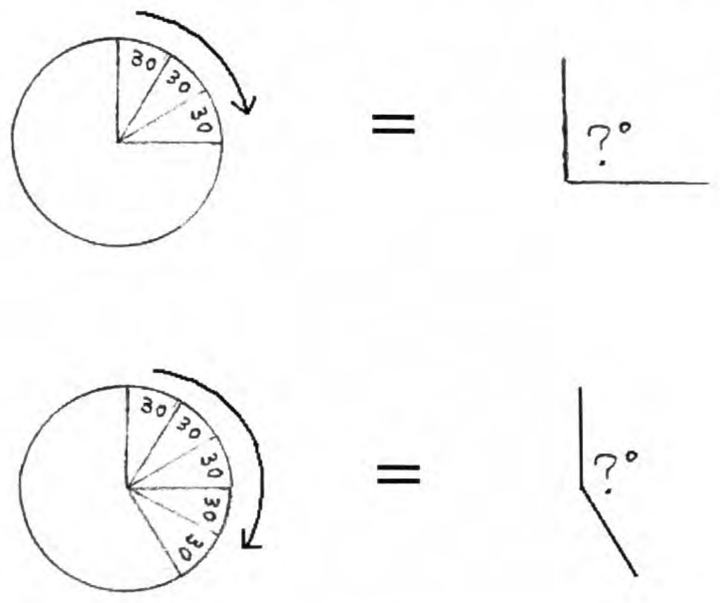
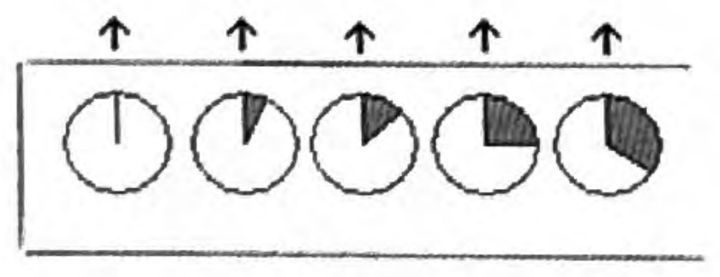
Introduce the lesson by asking, "What are angles?" Good answers to draw out are "two connected lines" or "corners." Then teach the key point: the size of an angle depends on how open or closed it is, not on how long its lines are. Focus student attention on the landmark angles, namely 60, 90, 180, and 360 degrees. The lines of a 90-degree angle can also be called perpendicular. A 180-degree angle is two lines opened up to form a straight line, and a 360-degree angle has opened up so much that it has closed back on itself, looking a lot like a 0-degree angle. A "spin jump" by the teacher or a volunteer makes the 180 and 360 landmarks memorable.

Learning objectives
By the end of the lesson, students will be able to:
- Estimate and compare the sizes of angles.
- Recognize the landmark angles of 60, 90, 180, and 360 degrees.
- Explain that an angle's size depends on how open it is, not its line length.
- Use a protractor (paper or real) to draw an angle of a given measure.
Common Core alignment
- CCSS.MATH.CONTENT.4.MD.C.5
Recognize angles as geometric shapes that are formed wherever two rays share a common endpoint, and understand concepts of angle measurement.
Treating an angle as 'how open' the two rays are, independent of line length, is the core idea of this standard.
- CCSS.MATH.CONTENT.4.MD.C.6
Measure angles in whole-number degrees using a protractor. Sketch angles of specified measure.
Using the rotating paper protractor to set and read angle measures gives students protractor practice across the full range of degree values.
- CCSS.MATH.CONTENT.4.G.A.1
Draw points, lines, line segments, rays, angles (right, acute, obtuse), and perpendicular and parallel lines. Identify these in two-dimensional figures.
Recognizing the landmark angles (right, acute, obtuse) is the angle-drawing piece of this standard.
Materials
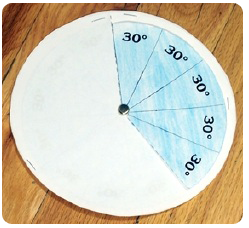
- 30-degree sheets, page 117 (1 per student)
- Circle sheets, page 118 (2 per student)
- Angle sheets, pages 119–121 (1 set per student)
- Crayons, scissors, a stapler, and brass tacks
- Protractors, or the student-made paper protractors
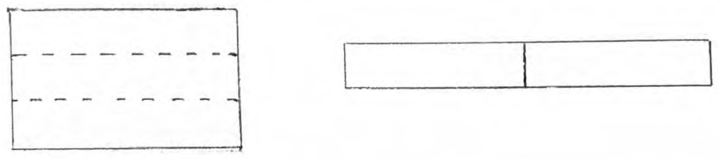
- 12" × 18" construction paper, pre-folded into thirds (1 per student)
- Glue sticks (1 per student)
- The completed project, prepared by the teacher before the lesson
The project
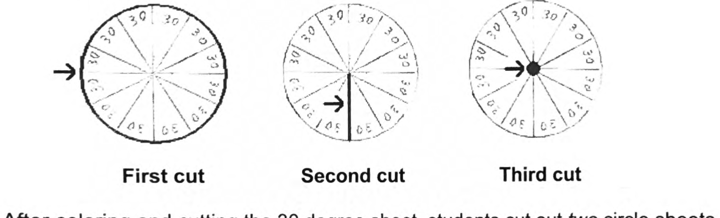
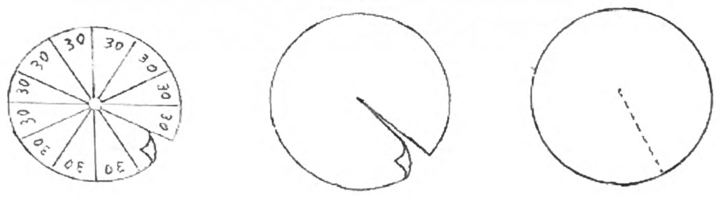
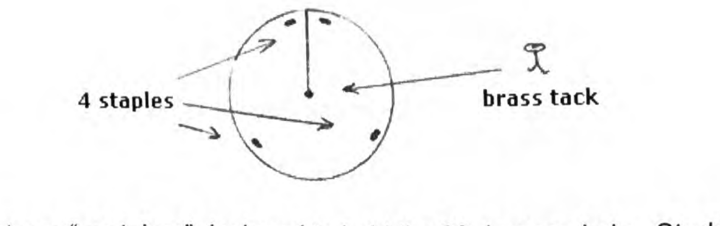
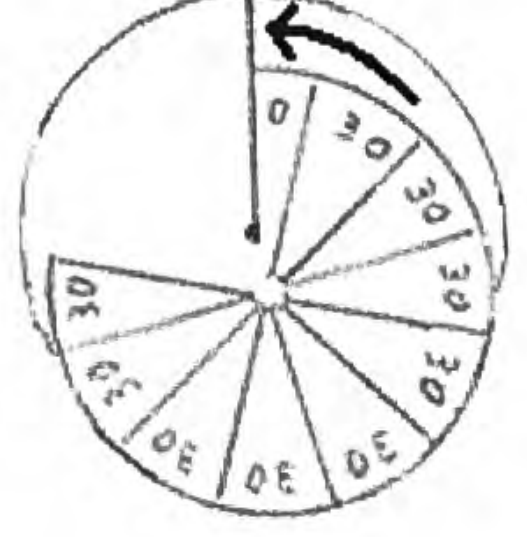
Students begin the rotating paper protractor by coloring their 30-degree sheet with a single crayon, then making three cuts: around the circle, down the dotted line to the middle, and finally the small dot at the center. They cut out two circle sheets, cutting along the dotted line on only one of them. The 30-degree circle is slightly smaller so it can rotate once it is placed between the others. When a student has all three pieces, the teacher helps assemble them: staple the two plain circles together with four staples and a brass tack to form a container, then slide the 30-degree circle in through the slit so it can turn.
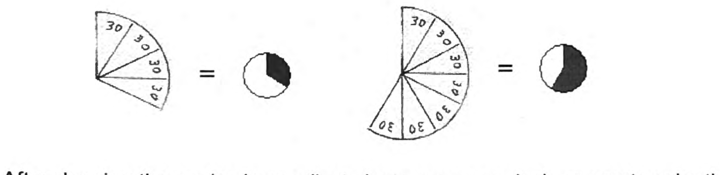
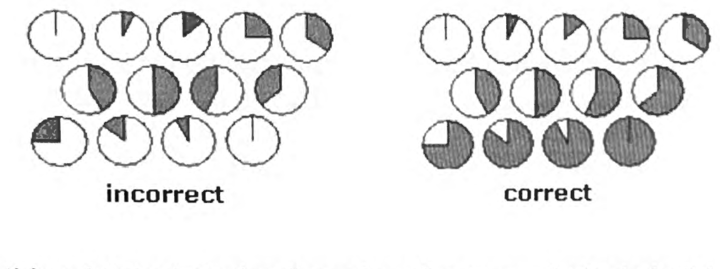
For the angle comparison strip, students use the paper protractor to measure and draw the thirteen angle measurements on the angle sheets, which has them counting by 30s and drawing angles equal in degree measure but smaller in scale. They color the interior of each angle, cut out each circle, and glue the circles in order along a long strip made by joining two thirds of the pre-folded construction paper end to end. The circles should be tightly arranged, in order, and all pointing the same direction, with the top line of each angle pointing up. (It helps to remind students that angles are the same size whether or not a circle is drawn around them.)
Common student mistakes
- Judging an angle by its line length. A wide angle with short lines is still wide. Size is about how open the angle is, not how long the rays are drawn.
- Coloring the wrong side of an angle over 180 degrees. Very common, and actually instructive: it makes students think about the reflex angle. The book suggests not warning them in advance and keeping spare angle sheets on hand.
- Gluing the circles out of order or facing different ways. The strip only works for comparison if the angles are in order and all point the same direction.
Related lessons
Perpendicular & Parallel Lines
The lines of a 90-degree angle are perpendicular, so the two lessons reinforce each other.
Similar Triangles
Comparing triangles depends on the angle estimation built here.
Shapes
Shape definitions hinge on angles (acute, obtuse, right), which this lesson makes concrete.
Reflections, Translations, & Rotations
Rotations are measured in degrees, the same landmark angles used here.