Lesson · 2nd & 3rd Grade
Money
This lesson helps students visualize and memorize how many quarters, dimes, nickels, and pennies make up a dollar. The finished project is an abstract picture of five different ways to make 100 cents: a dollar bill, 4 quarters, 10 dimes, 20 nickels, and 100 pennies.

The big idea
This lesson is more time-consuming than many of the others, but it's worth students' time. Beyond laying the groundwork for future money lessons, it's a highly motivating way to get students thinking about multiplication and division. Understanding that 20 nickels equal a dollar (that 20 × 5 = 100 and 100 ÷ 5 = 20) is a great first step toward understanding the components of future multiplication and division problems.
Learning objectives
By the end of the lesson, students will be able to:
- State how many quarters, dimes, nickels, and pennies make a dollar.
- Distinguish the number of coins from the number of cents.
- Use skip-counting, repeated addition, or multiplication to count a group of coins.
- Connect coin counts to early multiplication and division facts.
Before the lesson: teacher preparation
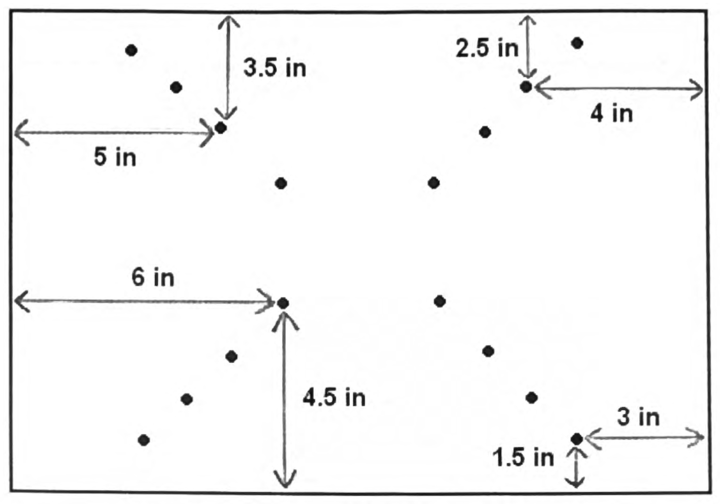
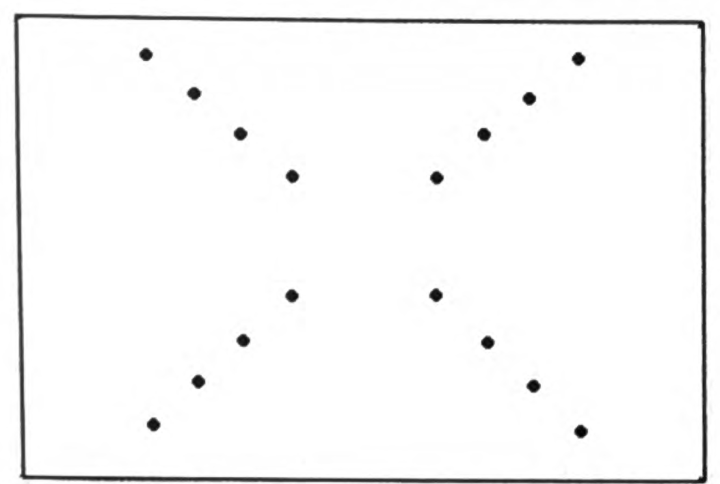
Each student needs a 12" × 18" sheet of brightly colored construction paper marked with sixteen dots (and no lines). Prepare these all at once with a guide sheet: use a ruler to lay out exactly where the dots belong, then stack ten sheets at a time with the guide on top and punch sixteen pin holes through the stack with the sharp point of a compass. Go over each hole with a black marker so it's easy to see. Students will connect these dots into four rectangles, one for each coin.
Common Core alignment
- CCSS.MATH.CONTENT.2.MD.C.8
Solve word problems involving dollar bills, quarters, dimes, nickels, and pennies, using $ and ¢ symbols appropriately.
Tracing four quarters, ten dimes, twenty nickels, and a hundred pennies into one design gives students the coin-and-dollar relationships this standard names.
Materials
- Pencils (1 per student)
- Fake plastic coins (one quarter, dime, nickel, and penny per student)
- Rulers (1 per student)
- Brightly colored 12" × 18" construction paper, with guide dots pre-punched by the teacher (1 per student)
- Brown, grey, and green crayons
- The completed project, prepared by the teacher before the lesson
The project
Before handing out the dotted paper, ask the class to figure out how many quarters, dimes, nickels, and pennies are needed to make a dollar. Talk through the various ways to find each amount: counting on fingers by fives and tens, multiplication, and repeated addition.
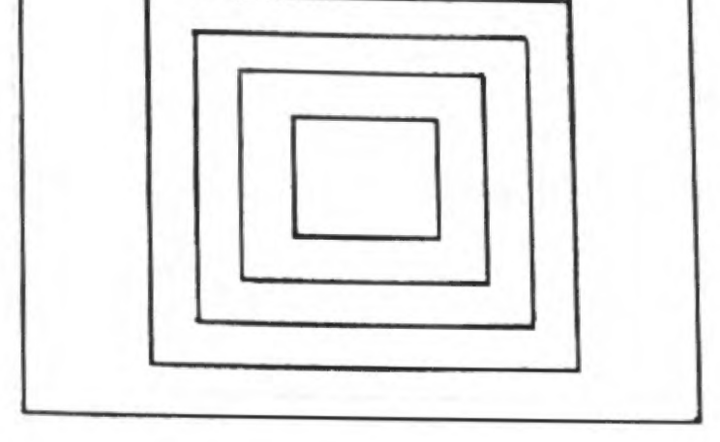
Every step needs to be carefully modeled by the teacher; tape a piece of construction paper identical to the students' to the board or easel and work alongside them. Students first connect the dots with a ruler so that, like yours, their paper shows four rectangles. Save all coloring until the end.
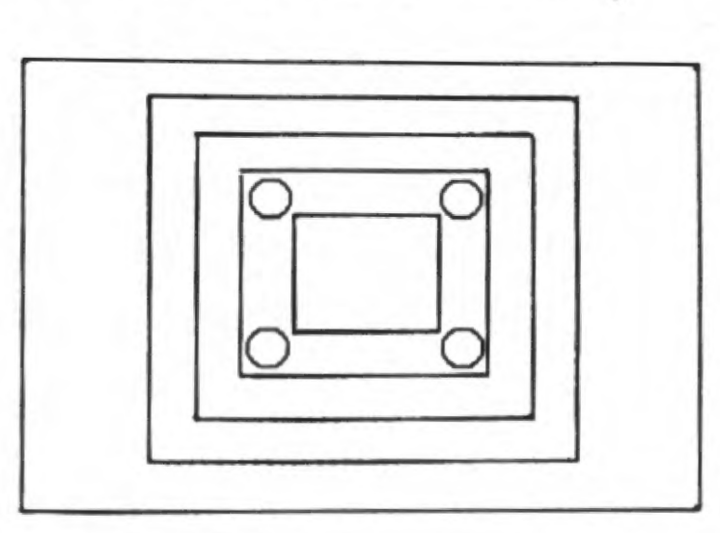
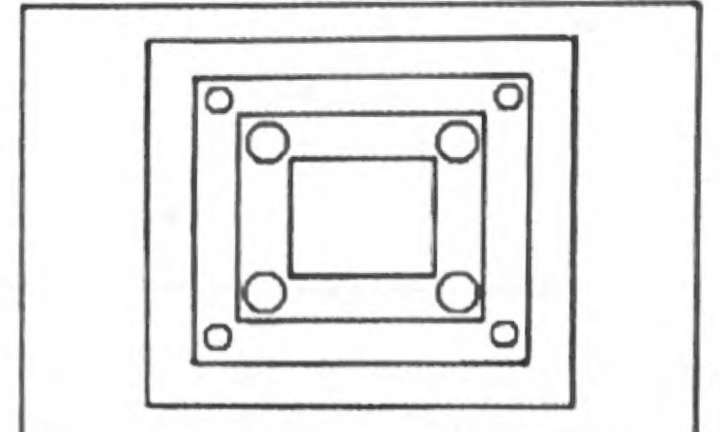
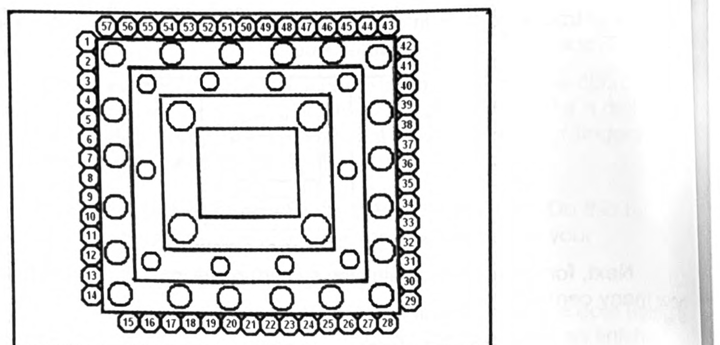
Trace the coins in order of size. Quarters first. Model tracing the plastic quarter four times, one in each inner corner.
Dimes next. Start with one in each corner, then two more on the top and bottom and the final two on the sides, for ten in all. As students trace, ask "How many cents in dimes have we traced so far?" Some will answer "four," confusing the number of coins with the number of cents; questions like this throughout the lesson clear up that confusion.
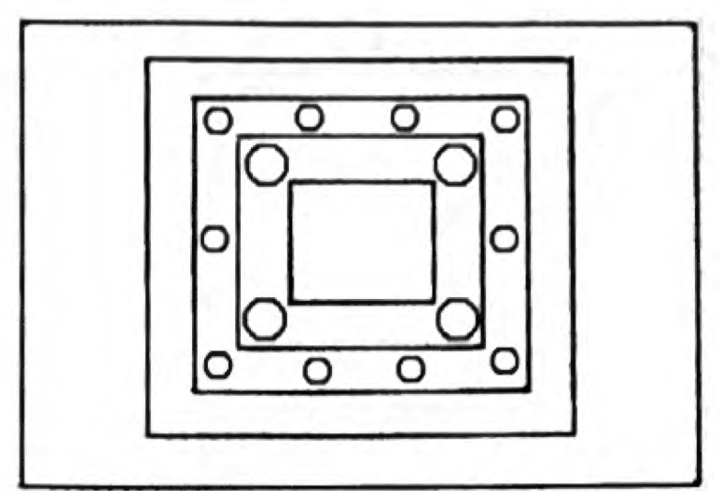
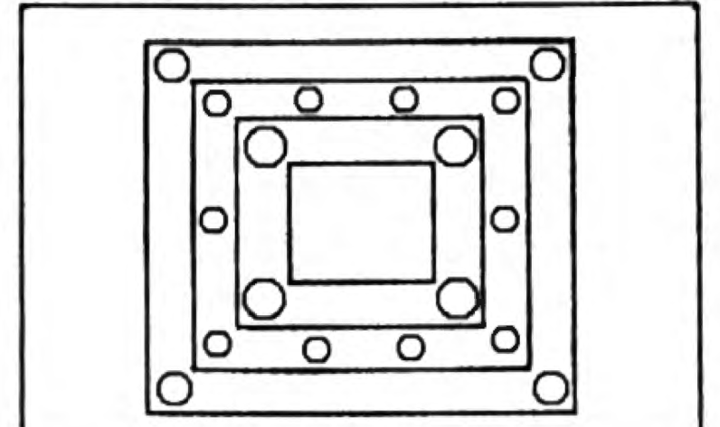
Nickels come next. Begin again with one in each corner ("four nickels equals how many cents?") and fill in around the rectangle to reach twenty.
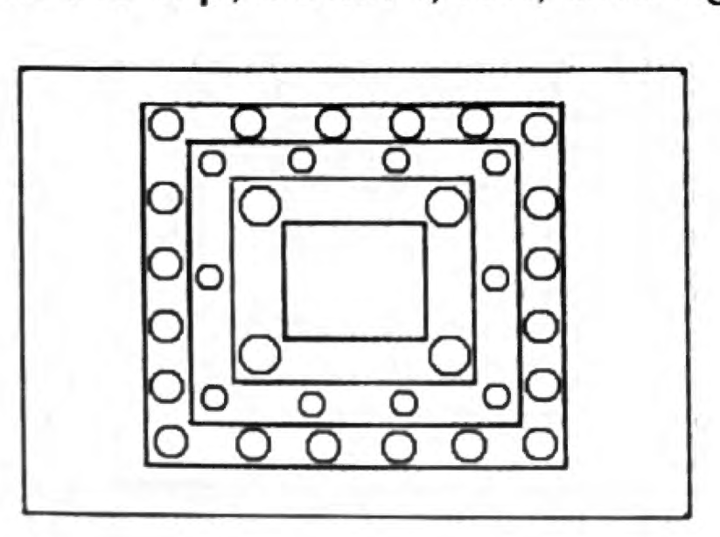
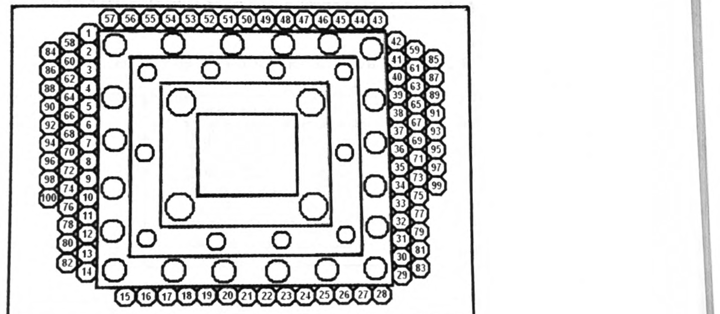
Save the pennies for last and make them feel like the grand finale. Have students number each penny as they trace it so they don't lose count: start with a loop around the perimeter of the rectangle (about fifty pennies), then distribute the rest evenly down the right and left margins, alternating back and forth.
Finally, students color all the coins with crayon: grey, brown, and green. An easy way to make the project look sharp is to color the rim of each coin dark and the interior light.
Common student mistakes
- Confusing coins with cents. "Four dimes" is not "four cents." Keep asking the cents question as students trace.
- Losing count of the pennies. Numbering each penny while tracing (not after) is what keeps the count of 100 honest.
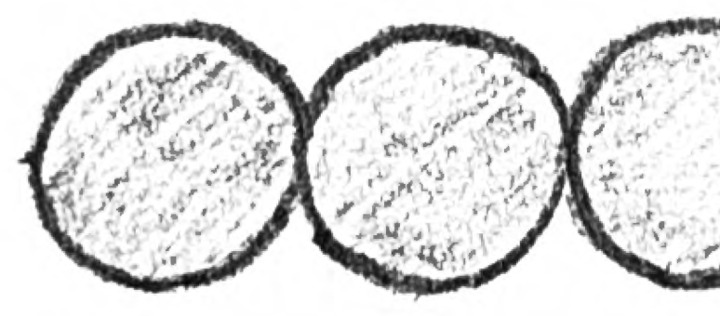
- Running out of room. Pennies traced with gaps won't fit. Tell students every penny should touch its neighbors and the rectangle.
Related lessons
Multiplication
20 nickels make a dollar because 20 × 5 = 100. Coin counts are multiplication facts in disguise.
Division
100 ÷ 5 = 20 is the same fact read the other way; money is a natural place to meet division.
Multiples
Counting coins by fives and tens is skip-counting through multiples.
Time
Reading minutes by fives uses the same skip-counting as counting nickels.