Lesson · 2nd, 3rd, & 4th Grade
Centimeter Measurement
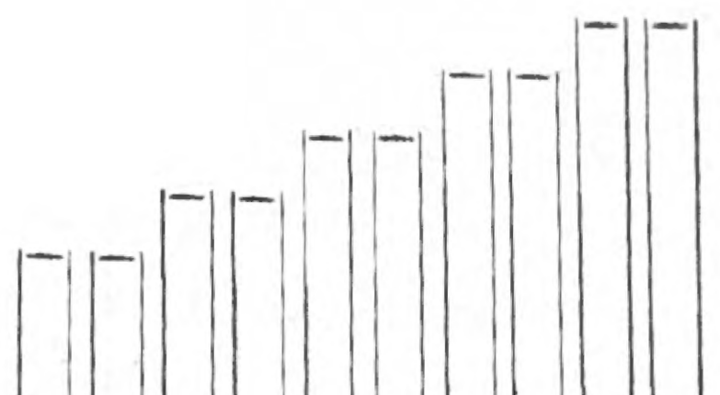
This lesson teaches students to measure lengths in centimeters. More specifically, they must accurately measure five lengths: 26, 24½, 23, 21½, and 20 centimeters, then thread the measured strips into a standing design.

The big idea
This is the metric companion to the Inch Measurement lesson, and the same cautions apply. Watch for the common measurement mistakes: students who fail to line up the zero, who let the ruler shift while reading a length, who forget the half on a measurement like 24½, or who confuse half marks with quarter marks. The art keeps the practice from feeling like a drill.
Learning objectives
By the end of the lesson, students will be able to:
- Line a ruler up at zero and measure centimeter lengths accurately.
- Measure half-centimeter lengths such as 24½ and 21½.
- Mark a measured length precisely with a dash.
- Follow a multi-step construction that depends on accurate measuring.
Common Core alignment
- CCSS.MATH.CONTENT.2.MD.A.1
Measure the length of an object by selecting and using appropriate tools such as rulers, yardsticks, meter sticks, and measuring tapes.
Measuring each strip in centimeters with a ruler is the same tool-and-technique work this standard names.
- CCSS.MATH.CONTENT.2.MD.A.2
Measure the length of an object twice, using length units of different lengths for the two measurements; describe how the two measurements relate to the size of the unit chosen.
Taught alongside Inch Measurement, this lesson naturally pairs students' inch and centimeter readings of similar lengths.
Materials
- Pencils (1 per student)
- Starter sheets, page 102 (1 per student)
- Rulers (1 per student)
- Scissors (1 per student)
- 9" × 12" construction paper (1 sheet per student)
- Glue sticks (1 per student)
- The completed project, prepared by the teacher before the lesson
The project
Students start by measuring and marking the appropriate length of each strip on their starter sheet, beginning at each strip's point and placing a dash to mark the distance measured.
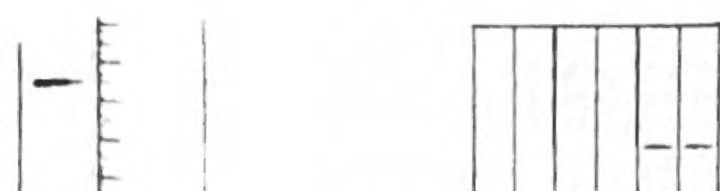
Before students cut, the teacher should check each one's work to see whether the measurements were done properly. When students cut out the eight strips, they should be careful not to cut off the pointed ends where the numbers are written. They then fold over the pointed ends of each strip, making them hook-like.
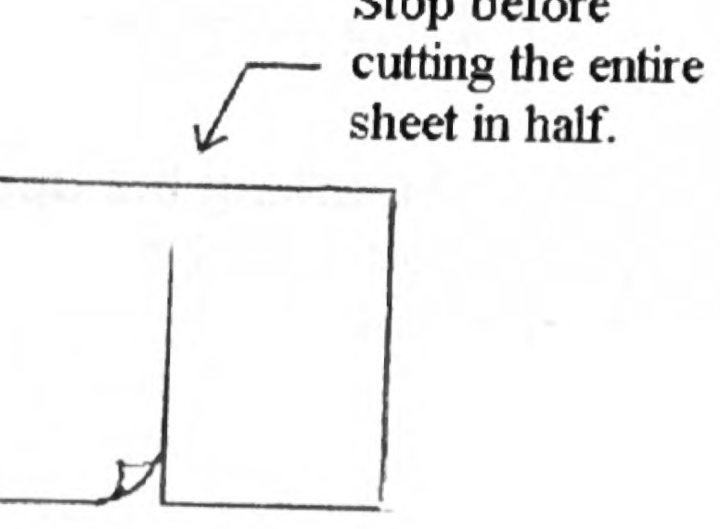
Next, students prepare their 9" × 12" construction paper by folding it in half and then unfolding it, so a line is visible through the middle. They cut along that line but stop a small distance before cutting the paper completely in half.
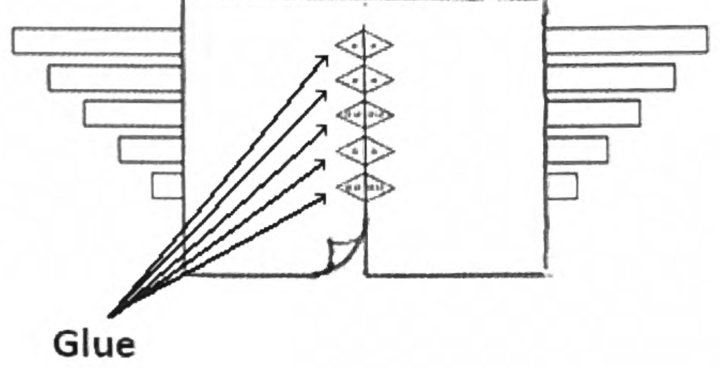
Now comes the tricky part, which is worth taping up at the front of the room because it is hard to explain: students slip their eight strips through the slit so that only the small pointed flaps peek up through the middle.
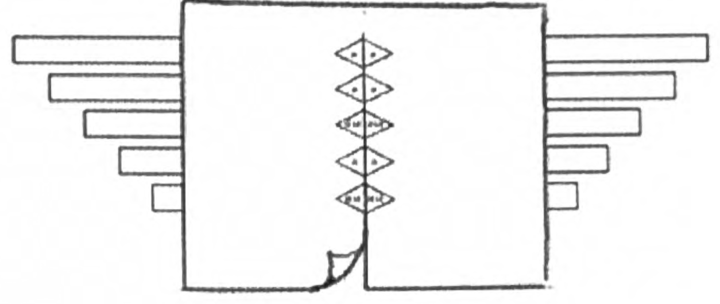
They glue down each of the eight flaps, keeping them evenly spaced, then flip the whole project over so the flaps are underneath.
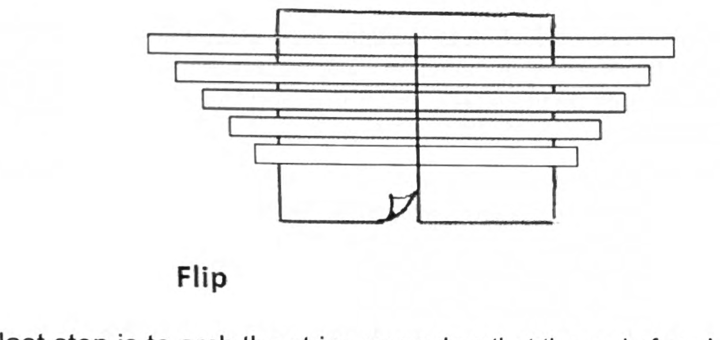
As a last step, they arch each strip upward and glue its other end to the construction paper.
Common student mistakes
- Cutting off the pointed ends. The numbered points are needed for threading. Remind students to leave them on.
- Cutting the base all the way through. The slit has to stop short, or the strips have nothing to thread into.
- Forgetting the half-centimeter. 24½ becomes 24. Flag the half-length strips before students measure.
Related lessons
Inch Measurement
The customary-unit companion to this lesson, using the same measuring technique.
Radius of a Circle
Drawing circles from given radii in centimeters reuses this careful metric measuring.
Map Scale
Copying and applying a map scale depends on precise ruler work.
Perimeter
Another lesson that builds a figure out of measured lengths.